Rainbow Striped Meringues

I had a food class where we made something with custard, and there were a bunch of egg whites leftover.

So of course I asked if I could take them home.

At the time, I was honestly more excited about the egg whites than the actual item we were making (which in case you were wondering was galaktoboureko; which was really nice by the way; which I prefer to call galactic burrito) because I couldn’t help but think of all the things I could make. I was hoping that egg whites would store well, because it meant I could make swiss meringue buttercream, meringues, macarons, angel food cake, cupcakes that require egg whites instead of whole eggs – SO MANY THINGS. It really excited me. The fact that they freeze well too? It made me wish that I brought home more than 14 (well there was like 22 but I decided against taking them all…)

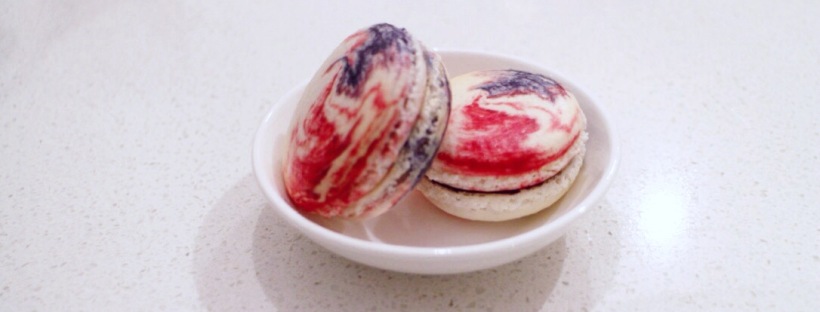
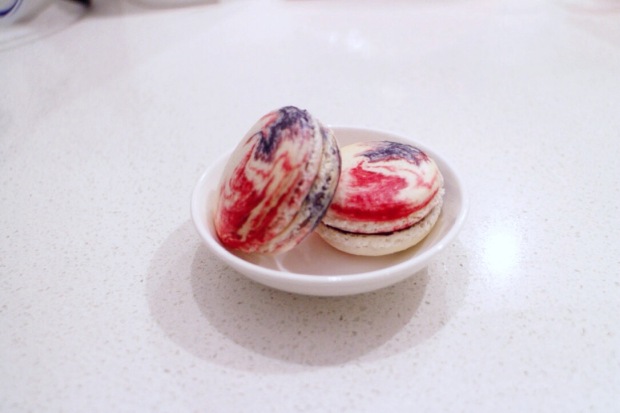
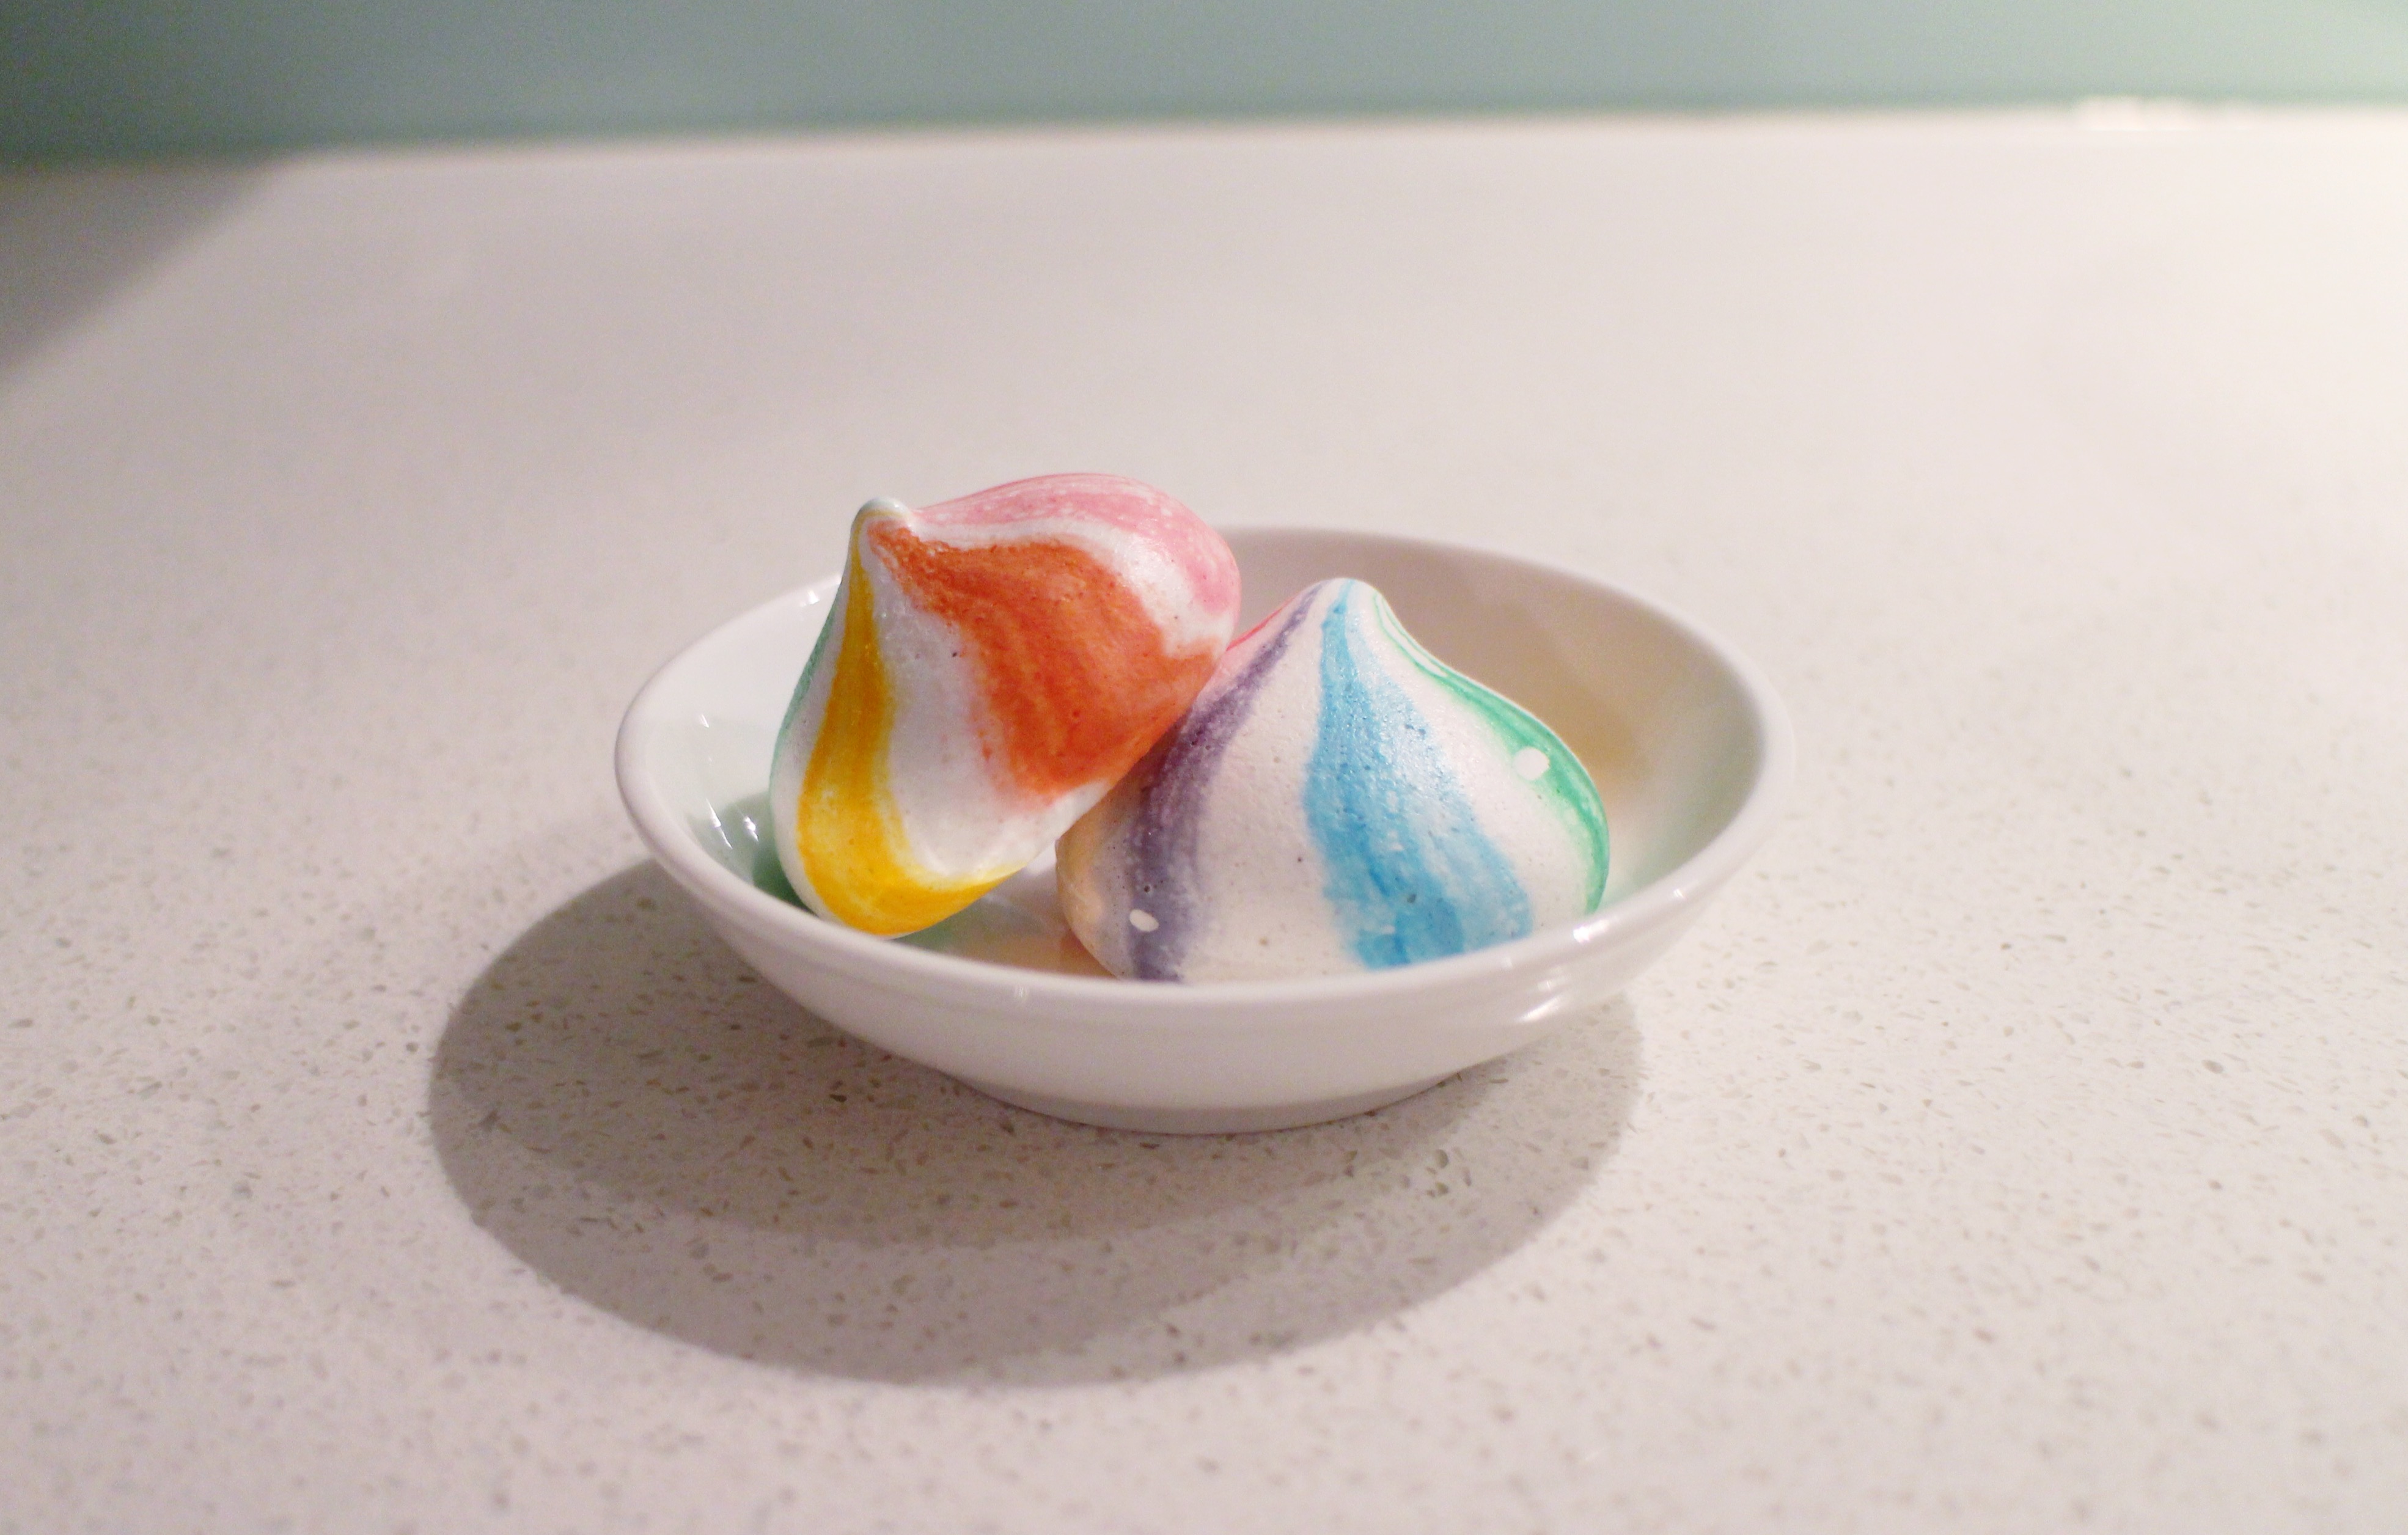
I talked about my obsession with striping things now, I just had to make rainbow meringues. I just had to.

IMG_9068

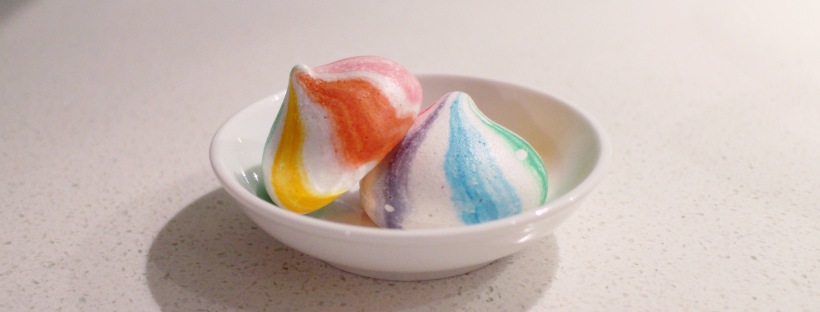
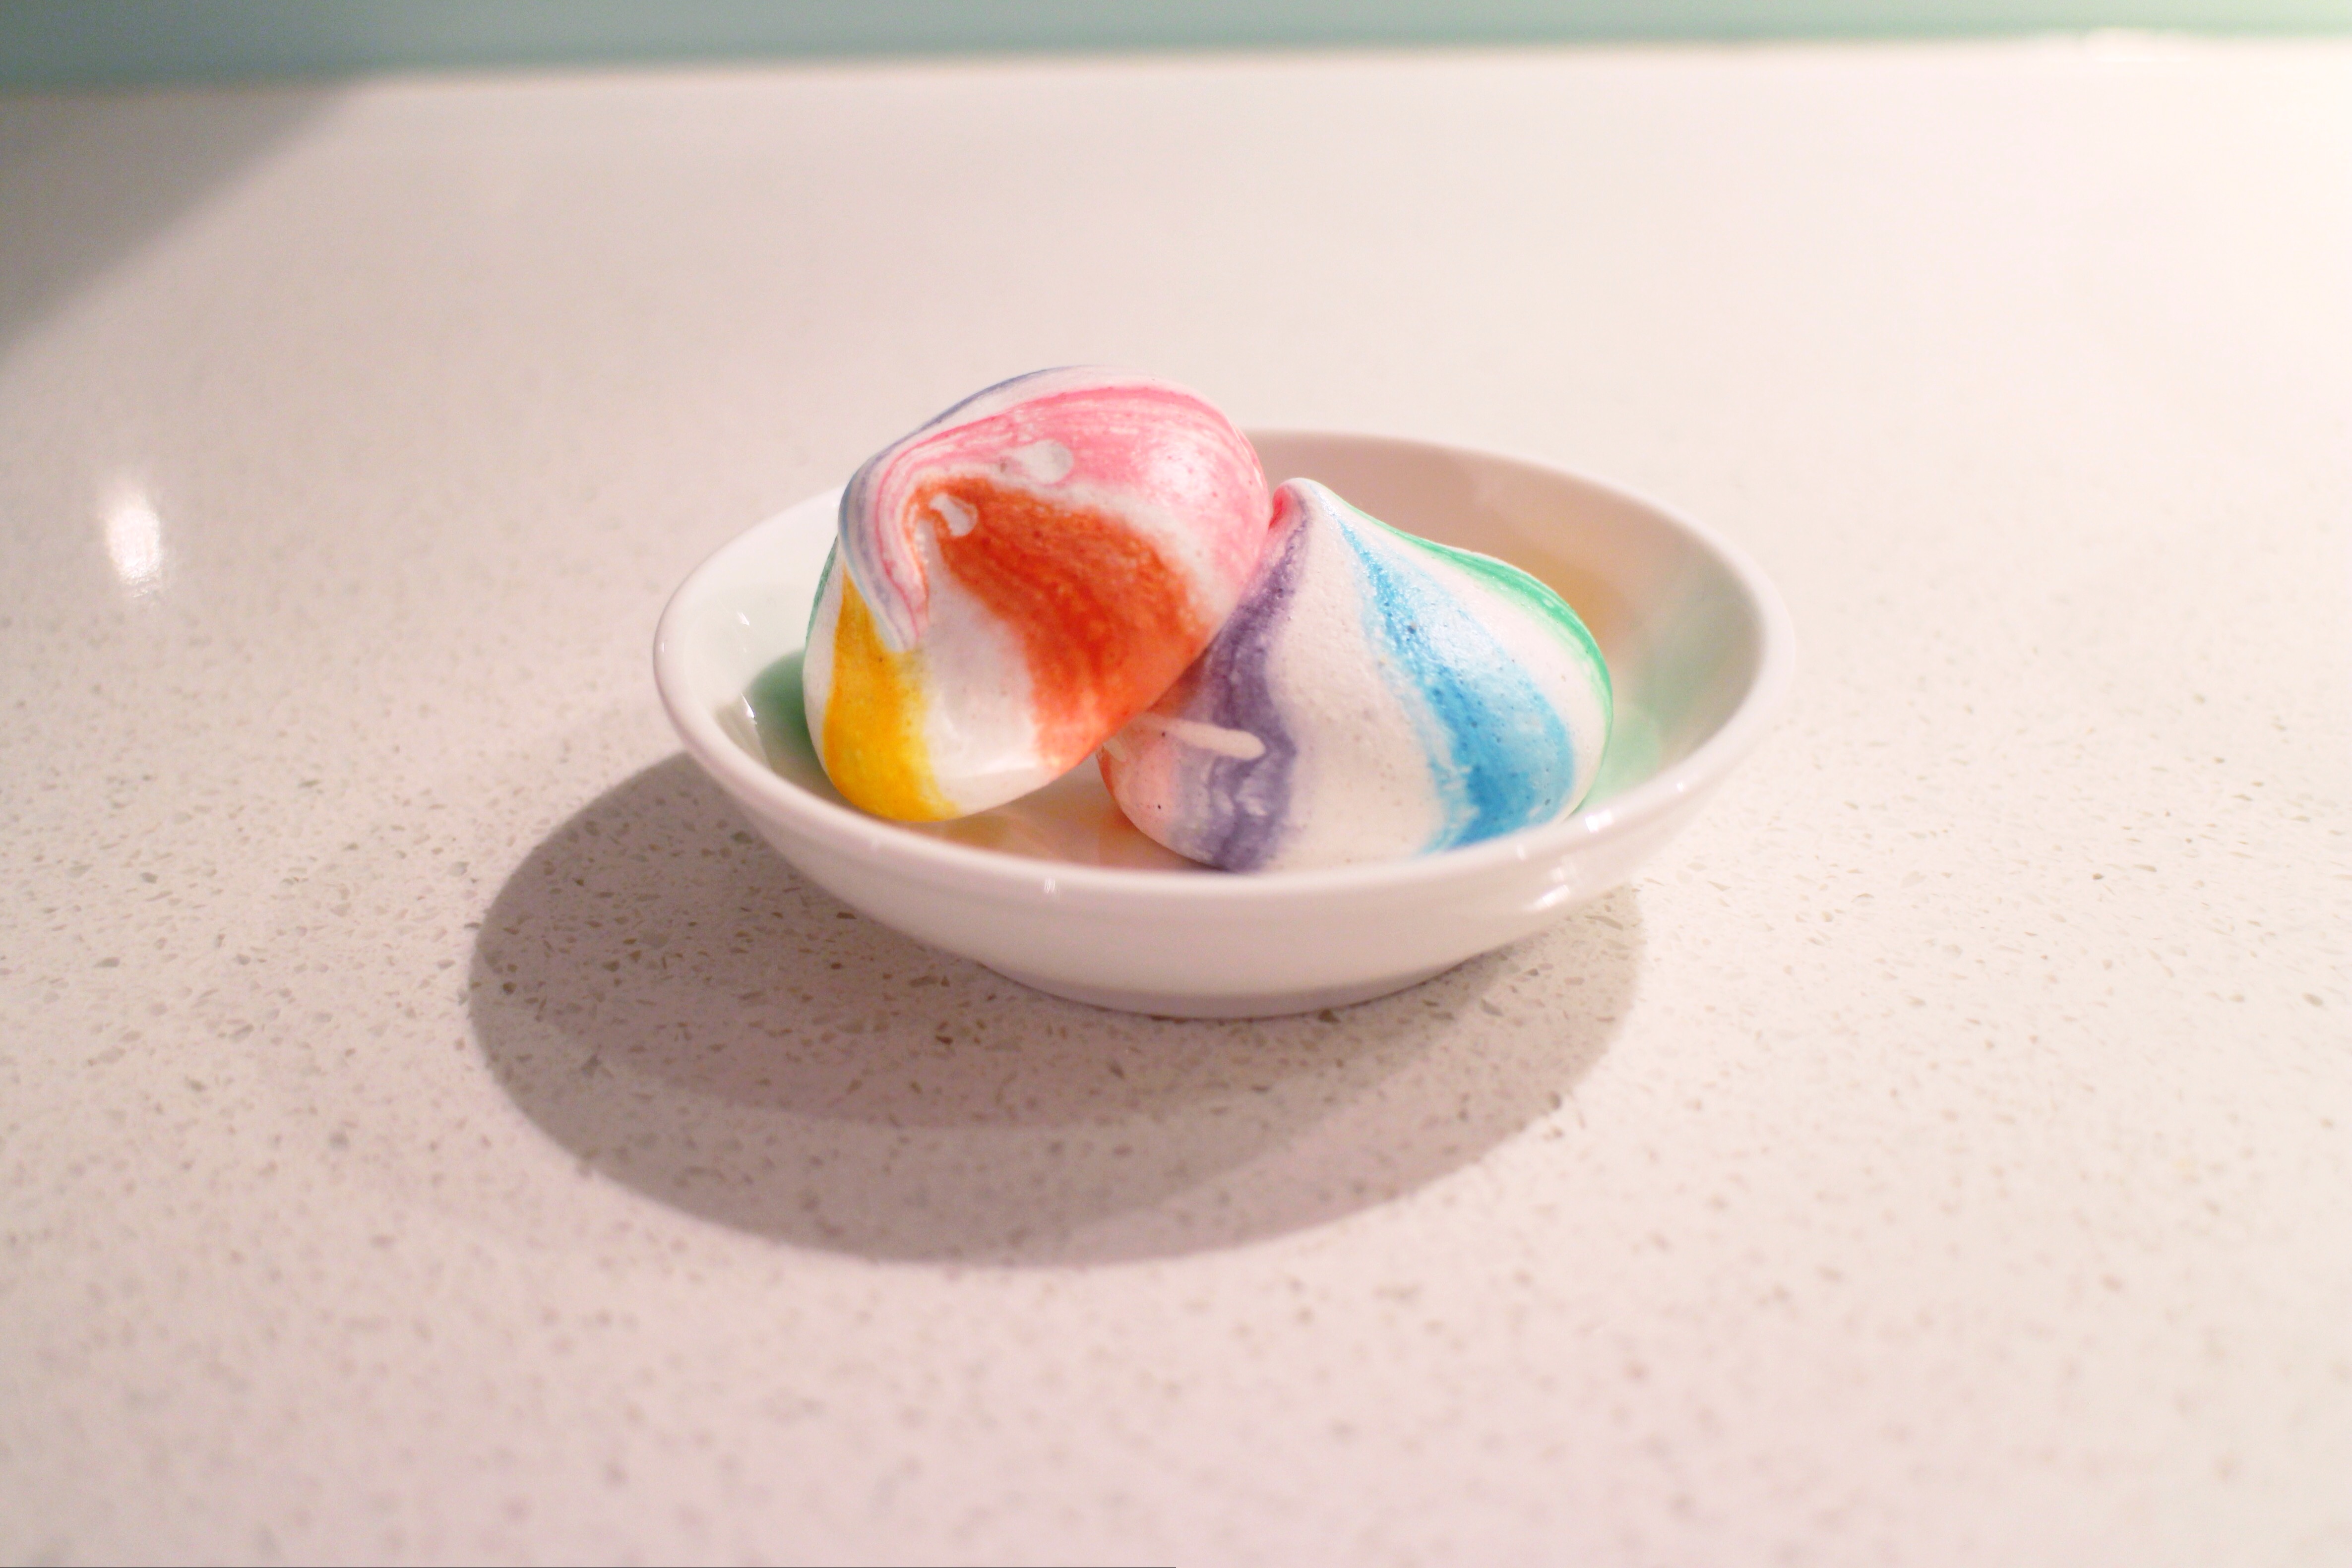
THEY’RE SO ADORABLE. THEY’RE LIKE LITTLE MAGICAL BABY UNICORN DROPPINGS. OR RAINBOW TOOTHPASTE. OR IF YOU DON’T LIKE FUN AND IMAGINATION RAINBOW STRIPED MARSHMALLOWS. (And yes I am aware that there is no orange since I didn’t have orange gel food colouring, but I put pink in there to compensate).

IMG_9067

One thing I learnt is that if you don’t have caster sugar, don’t even try to make meringues. I ran out of caster sugar, but I only discovered that once I’d foamed my egg whites. I chose to just use white sugar, which was like caster sugar but coarser. No matter how much I whipped, they didn’t dissolve. I just gave up at one point, and just piped them out. Reason why some of them have slightly droopy peaks.

IMG_9083

The recipe I used was Cupcake Jemma’s Circus Rainbow Marshmallow Meringues, but I didn’t have any mini marshmallows so I couldn’t use them. I found that although the recipe said for however much egg whites you have, double the sugar, it was waaay too sweet. Even too sweet for me and I usually have a sweet tooth. I think that next time I make these, I’ll definitely make sure I have those mini marshmallows and the right type of sugar.

IMG_9078

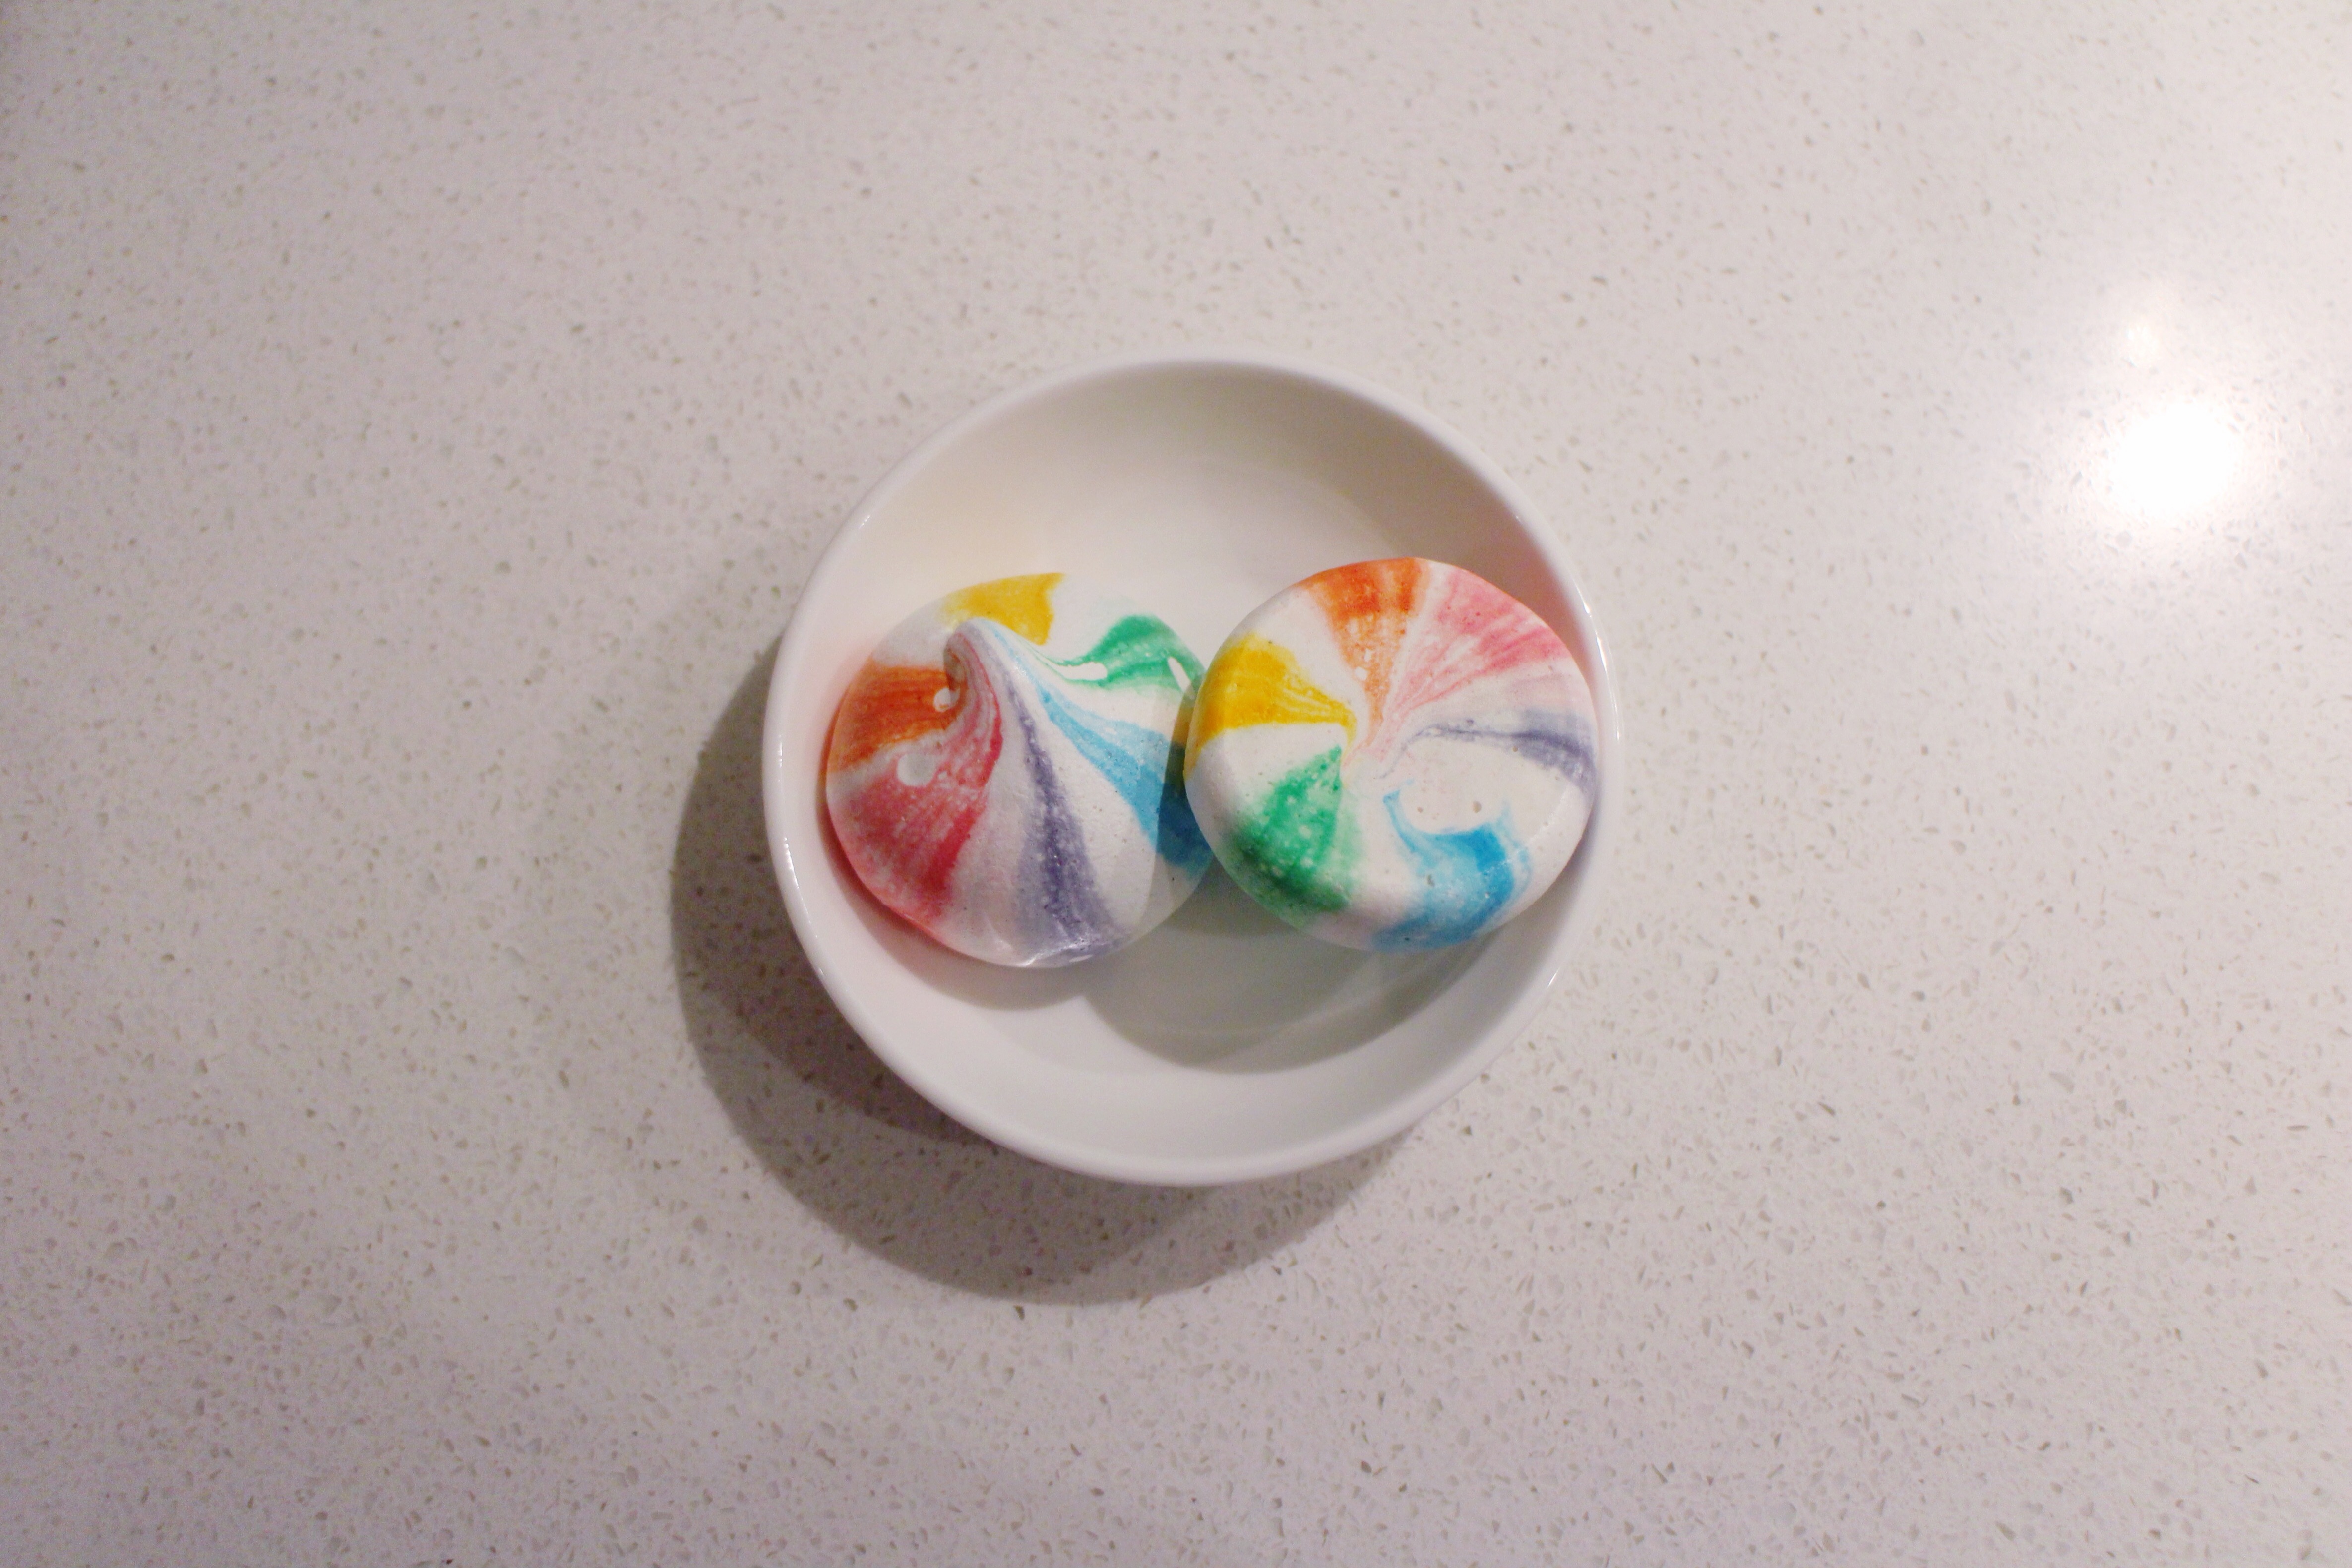
BUT BESIDES THE TROUBLES THAT I ENCOUNTERED AND DISCOVERED, LOOK AT THE UNDERSIDE! IT’S ALMOST, IF NOT JUST AS BEAUTIFUL AS THE TOP. I STILL HAVEN’T GOTTEN OVER THESE, DESPITE MAKING THESE WEEKS AGO. I DON’T THINK I’LL EVER GET OVER THE STRIPING EVERYTHING PHASE.

IMG_9071

It kind of sucks because the lighting in these photos are definitely worse than some of my others. I think from now on I’ll try my hardest to take all my photos in the morning, because that’s when I seem to get the best lighting.

IMG_9070

I hope that this quick little post brightened your day with all the rainbow colours! Hope you’re having a lovely day wherever you are (and if you’re not, I’m sending you heaps of rainbows, warm sunshine and big hugs).

– Jess

How to Achieve a Perfect Macaron (recipe + tips)

As promised, here is the post about those macarons that I said I would write in my last ‘let’s-rant-about-my-boring-life’ post.

Let me start off by saying that macarons aren’t that hard. A lot of people, including me, initially thought that macarons were these super hard pastries that are close to impossible to get right, like those fancy desserts you see in cooking shows. As long as you have a good recipe to follow carefully and some pointers on what can go wrong and how to avoid them, they can be simple enough. They can scare people by having these ‘pressure points’, which are usually enough to scare…well anyone. But as they say, you really don’t know until you try. So I’m here to share some of the tips that I’ve taken in whilst making them.

image2

IMG_7263

Recipe/Method for macarons adapted from Oh Sweet Day’s My Perfect Macaron. Tips/guides for macarons taken/adapted from I ❤ Macarons by Hisako Ogita (which is actually an amazing cookbook given to me by another beautiful friend. It’s really slim, the photography is amazing and has many tips for making macarons, recipes for many fillings, ways to combine different flavours of cream and macaron, gift wrapping ideas and dessert recipes for leftover egg yolks. It’s a fantastic cookbook and I highly recommend it, especially since it’s pretty inexpensive). Tips for ganache taken from Elise Strachan’s (MyCupcakeAddiction on YouTube) Chocolate Ganache Video (who’s videos are amazing and full of creative ideas which I would’ve absolutely loved as a birthday cake as a kid, and full of tips that you learn in expensive classes etc.) and Stef from the Cupcake Project’s Perfect Ganache Blogpost.

*Reminder: I am by no means a chef or recipe writer by any means. I just love baking and wrote up the recipe in a way that would’ve been easy for me to understand, it hopes that it’ll be easy to understand for anyone who reads this. These tips and recipe are in no means mine (as anything that isn’t mine is credited above). Now that that’s out of the way, here’s the recipe! (:

Ingredients:

  • 1 cup powdered sugar
  • 3/4 cup almond meal
  • 2 egg whites
  • 1/4 cup granulated sugar
  • Vanilla extract (optional)
  • Gel food colouring of choice (I used pink and purple)
  • 1/2 cup good quality dark chocolate; roughly chopped
  • 1/2 cup heavy whipping cream
  • 2 tbsp butter (optional)

Utensils:

  • Sieve – for sifting the almond meal and powdered sugar multiple times.
  • Measuring cups
  • Mixing bowls – I used two, pretty deep, stainless steel bowls. You’re going to want to have no fat in the bowl you’re mixing your meringues in, otherwise they won’t get all foamy. If your egg whites aren’t foaming, you’ll know that’s the problem.
  • Scale
  • Hand mixer/stand mixer (for making the meringue).
  • Piping bag and tip – I didn’t use the tip as I didn’t have a 1/2 an inch piping tip on hand. I use disposable piping bags as they’re pretty inexpensive and don’t require me to wash them up, haha.
  • Spatula – it’s best if it’s got a flexible edge and good quality, as it’ll be easier to do the macaronnage stage.
  • Food grade safe brush/food dedicated paintbrush – for striping the piping bag.
  • Cup filled with water – for washing out the one food colour out of the brush before the next colour, like painting.
  • Three large baking trays lined with baking/parchment paper – I know many people use silicone mats/guides, but I don’t have a silicone mat, but would like to get one in the future (because they’re pretty expensive here).

Macarons

  1. Line two large baking trays with baking paper and set aside.
  2. Sift together the almond meal and powdered sugar together.
  3. Mix the two thoroughly together, and sift again if you feel like it for extra measure.
  4. Place your egg whites in one of your mixing bowls (the deeper the better) and start mixing with your electric mixer with a whisk attachment on medium speed. Once they get all foamy and white, add in your sugar a tablespoon at a time. Here you can add the vanilla extract if using. Keep whisking until they form glossy, stiff peaks.
  5. Sift half of the almond meal and powdered sugar mixture on top of the meringue mixture. Fold the mixture into the meringue by going around and then cutting down the middle and folding it over. Once it’s somewhat mixed in, sift in the rest of the mixture and fold until it’s all combined. Continue folding until the batter drips slowly off the spatula when held up, and sits on top of the mixture, settling in 30 seconds later.
  6. (Optional) To get the swirly effect, get your gel food colouring and choose which colours you’d like. Grab you brush, dip it in food colouring, and starting from the bottom of the piping bag draw a line upwards to your desired height. Repeat with the rest of your colours, spacing evenly. Place your batter in your bag, scraping at the side of the bag where there’s no colouring.
  7. Pipe your macarons on to your tray, 3-5cm apart. Pick up each baking tray and rap them firmly on to the counter to get rid of any air bubbles.
  8. Let the batter dry at room temperature, uncovered for 15-30 minutes, or until when gently touched, they have formed a film on top and nothing comes off.
  9. Bake at 160°C for 10-12 minutes, inside another larger baking tray, then take out and let them cool completely.
  10. Once the shells are completely cooled, you can gently peel them off the baking paper and match them up ready for filling them.

Ganache:

  1. Heat the cream in a saucepan or the microwave (I prefer the saucepan as I can keep a close eye on it) on low-medium heat until it starts to boil.
  2. Take the cream off the heat and pour over the chocolate and begin the stir. The chocolate should start to melt and eventually incorporate the cream and become this delicious looking mixture. If you want, you can add the butter in.
  3. Once there’s no lumps and everything has melted and incorporated, take some cling wrap and cover it. You want the cling wrap to be right against the sides of the bowl and right on top of the ganache, as this prevents it forming a crust and the ganache having dry, crispy bits in it.
  4. You can let it sit at room temperature until it’s ready to use. The longer you let it sit, the thicker it’ll become so it depends on the consistency you want it. Since I piped them on to the macarons, I let it sit quite a while (6 hours) or you can put it in the fridge if you need it to thicken up quicker.
  5. Once the ganache is ready, you can pipe or spread the filling on to the macarons and gently sandwich them together (I do a gentle twist on top of the filling) and they’re done!

Tips Summary:

  • Remember to sift your almond meal and icing sugar mixture at least twice, if not more.
  • Make sure your bowl that you’re whipping up egg whites in is grease/fat free, or they won’t foam.
  • Don’t do the macaronnage stage less than ten times, and no more than twenty to avoid cracked macarons or macarons with oil stains.
  • Don’t forget to rap you baking trays firmly on the bench to get rid of any air bubbles and help the feet to form.
  • Make sure your macarons are ‘dried’ out before baking as this helps them to retain their lovely shell.
  • Bake your macarons inside another tray to avoid the bottoms overheating and cracking.
  • Peel your shells of the sheet gently after they’ve completely cooled.

The swirls turned out absolutely beautiful, and the combination of the dark chocolate ganache which was slightly bitter balanced out the sugary sweetness of the macaron shells perfectly. They turned out light and crispy on the outside, slightly chewy on the inside, and the smooth ganache on the inside. The swirls on top were just for photographic purposes and to make my creative heart inside of me sing.

IMG_9748

Processed with VSCOcam with hb1 preset

I had some leftover ganache (the measurements stated above made 18 very well filled macarons and that amount of leftover ganache, so if you want less, feel free to make less! Just make sure the ratio of chocolate to cream is 1:1 for a piping consistency.) I’d eat this stuff by the spoonful any day.

I really hope sharing this recipe/tips helped you achieve amazing macarons! Until next time, hope you’re having a lovely day wherever you are!

– Jess